In Zout you can print your orders from the order list page.
You can also configure zout to auto print orders when they are received using a windows tablet/laptop or pc, and there are instructions below to enable this on our recommended setup.
Manual Printing should be possible from most tablets, laptops and computers, to most thermal receipt printers. However, our recommended setup is using a windows tablet, laptop or pc to print to a USB thermal printer. It is difficult for us to provide support for every combination of device and printer, so we will talk through below how to setup our recommended printer, on a windows tablet to achieve both manual printing and auto printing.
Installing Our Recommended Printer on a Windows Device
Our recommended printer is a Star TSP143IIU which can be purchased here.
A good cost effective Windows tablet can be found here, but the setup process should be almost the same on any windows device.
Please note, should you wish to buy a different device or printer, our recommended setup is a Windows tablet with a USB port and USB thermal printer.
Step One – Download the Star Future Print software for the TPS100 series of printers. You can download it here
Step Two – Unzip the folder, and click “Auto Run”
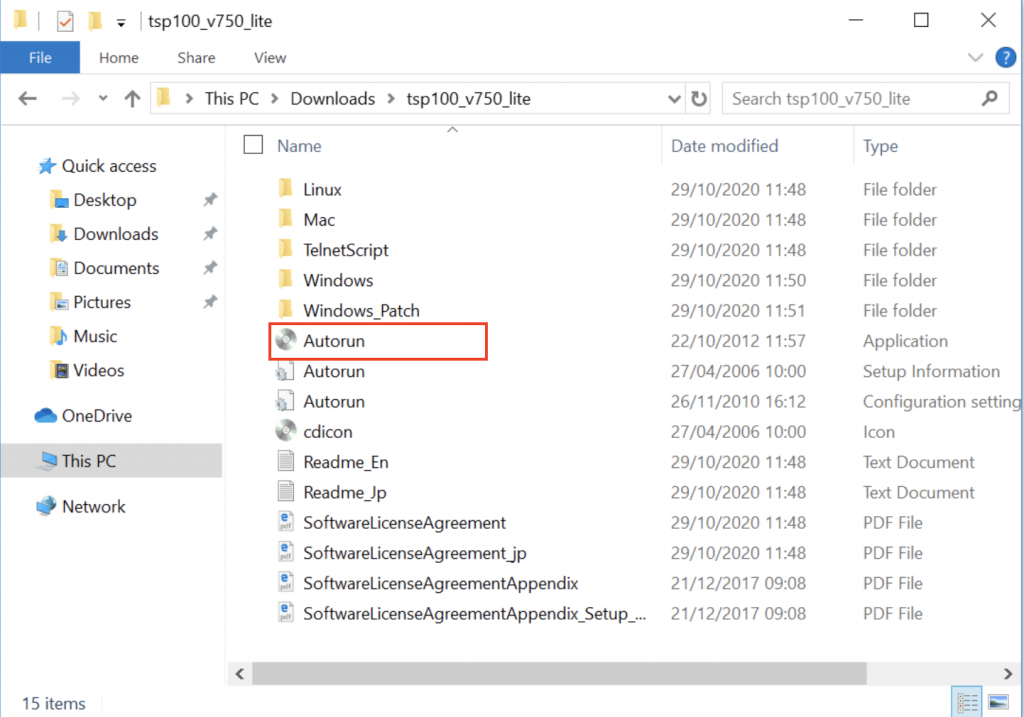
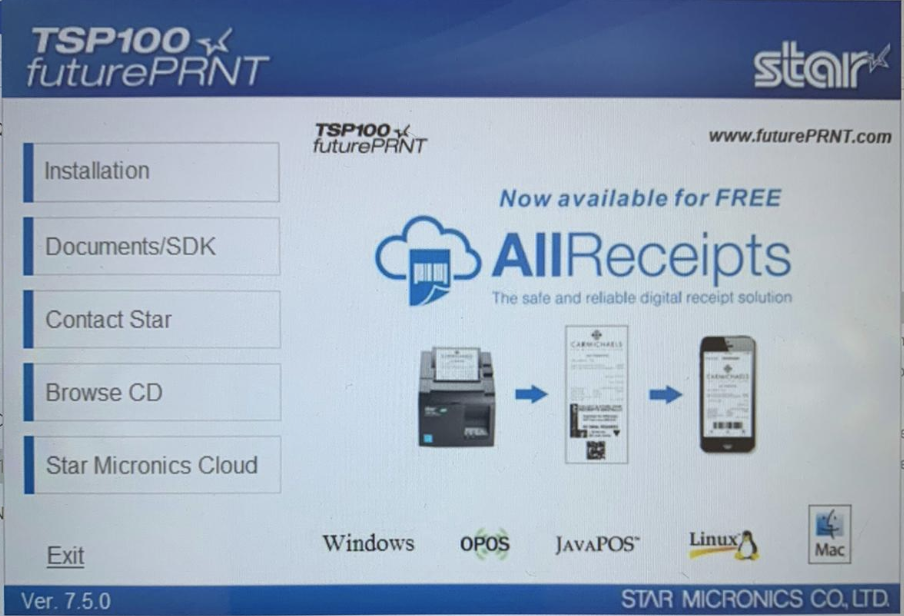
Click installation and follow the setup guide.
Step Three – Once the installation guide has ran, plug in your printer via a usb cable and go to your windows settings “Printers & Scanners” and select – “Add a printer or scanner”
Once you have searched for printers the Star TSP100 Cutter (TSP143) printer will appear in the list of printers, click on the printer, and click Manage.
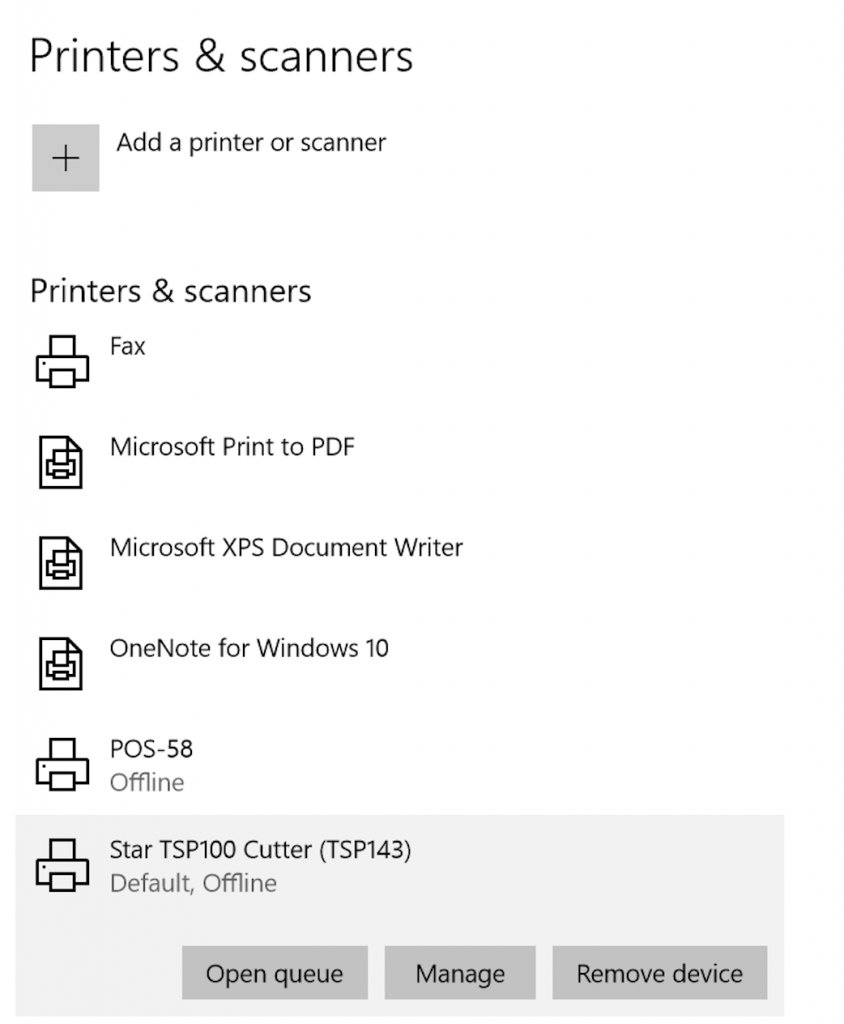
Step Four – Set the printer as default, then click on Printer Preferences.
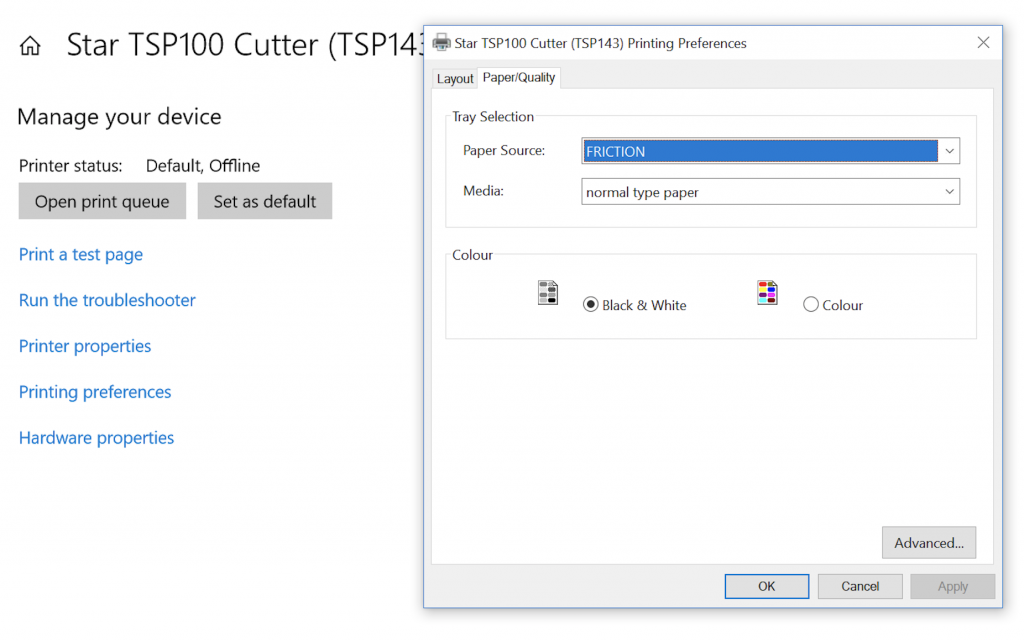
On the Paper/Quality tab ensure the paper source is set to friction.
Your printer is now installed.
Manual Printing
We recommend the browser Google Chrome for Zout usage.
From the Order List, on each order you can easily print orders manually.
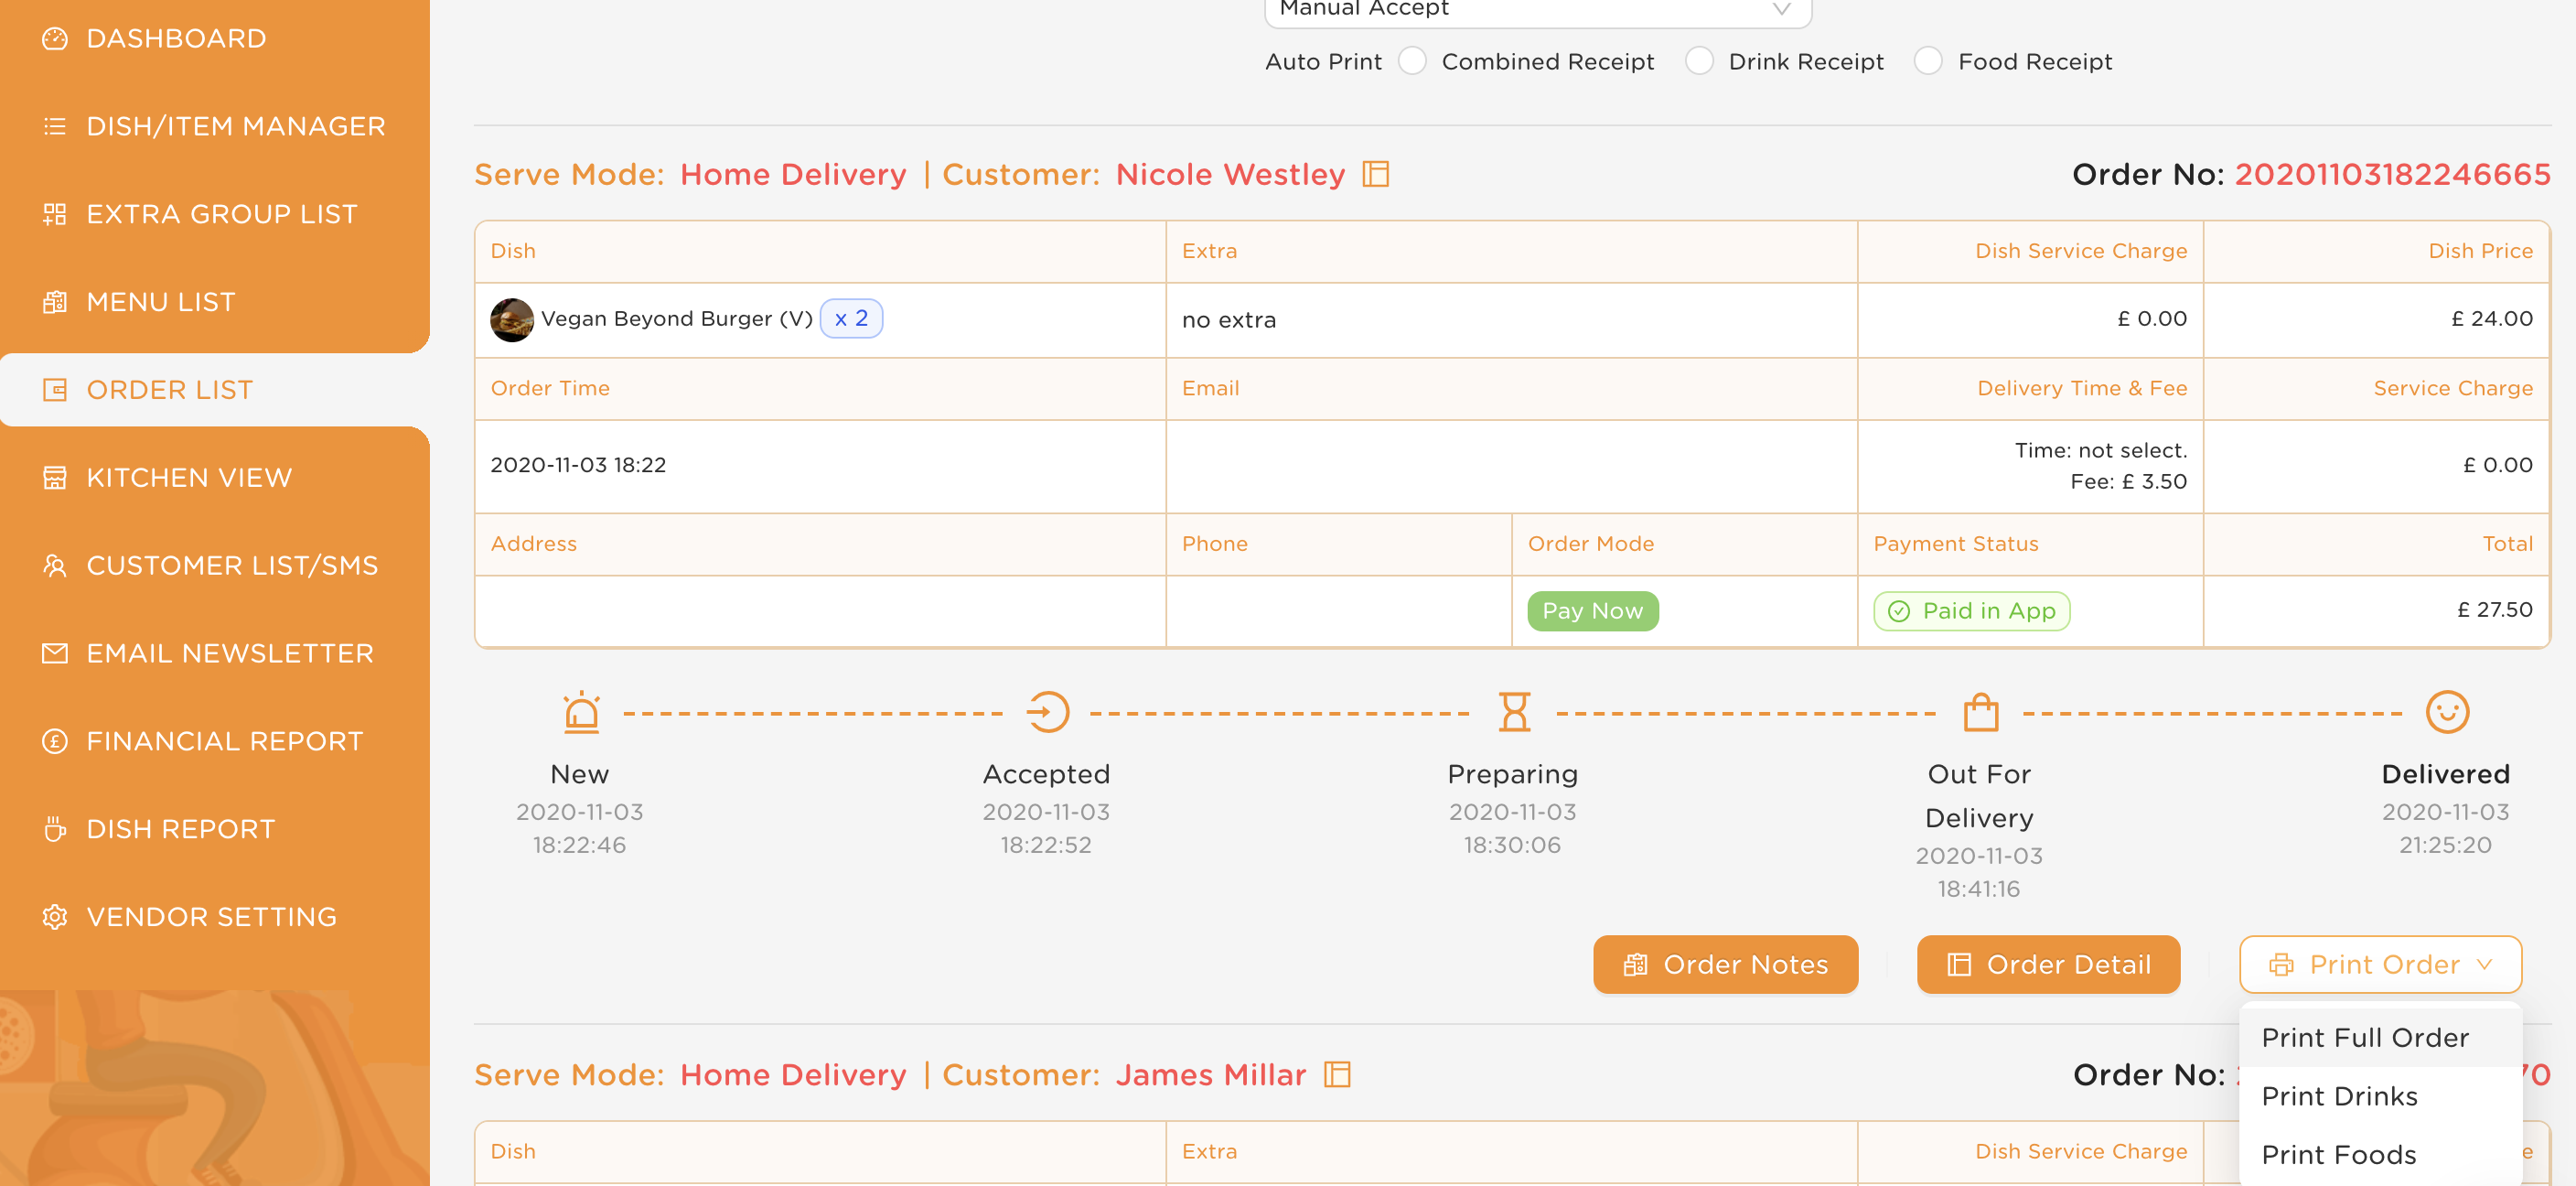
Click Print Order on the bottom right of the order, and select Print Full Order, Print Drinks or Print Foods
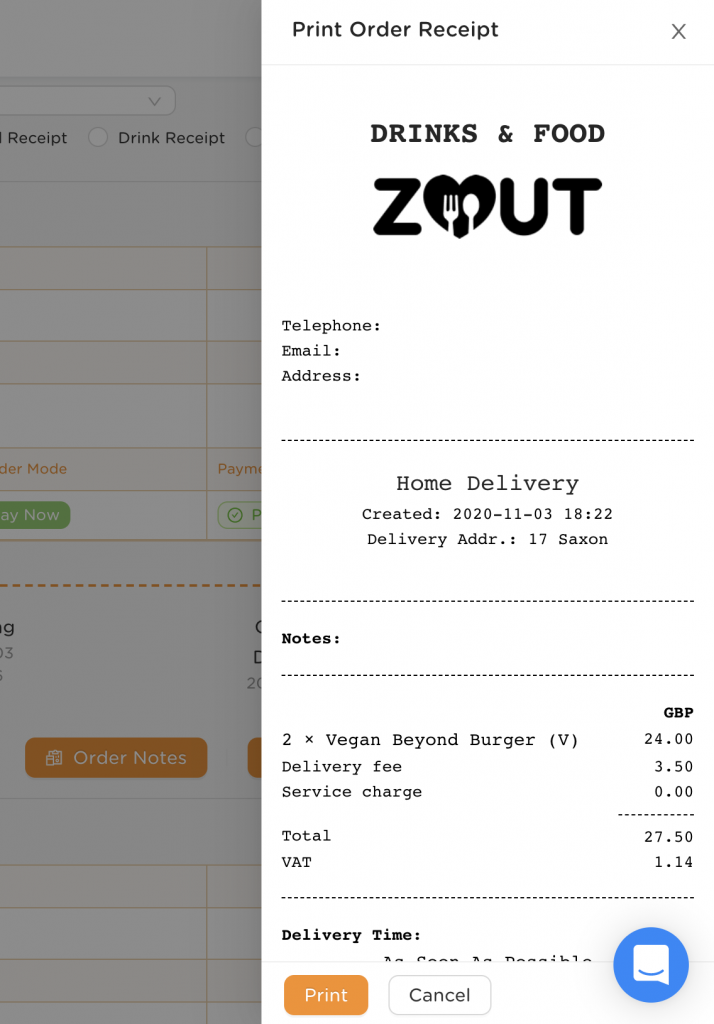
Here you can preview the receipt, and click Print
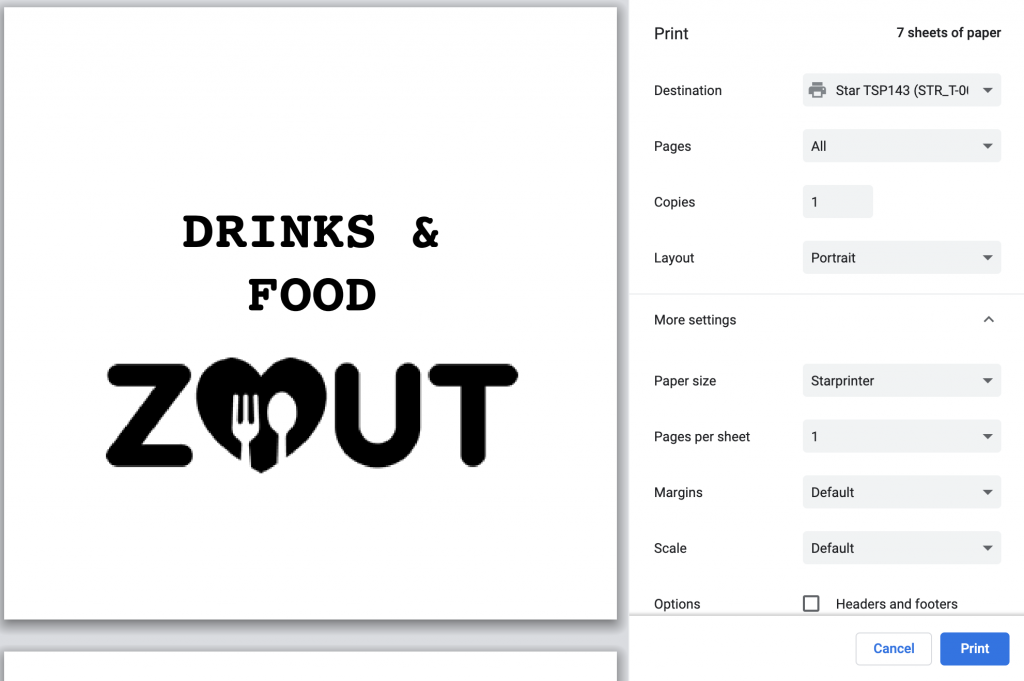
The print dialog will open, automatically selected to your star printer, if it does not, go back to previous steps and set the star printer as the default printer. Ensure the “Starprinter” paper size is selected, sometimes you may have to change this paper size to get printing to work correctly.
Once you have the correct settings here, each time you print it will use the same settings and print correctly.
Auto Printing / Auto Accept
Using Chrome In Auto Print Mode
Please note, test printing using the manual print method above first, so google chrome saves your correct printing preferences.
After this, you need to open Google Chrome in auto print mode.
To do this, download this file here, add it to your desktop, and use this shortcut to open chrome each time you want to use auto print mode.
Auto Accept / Manual Accept
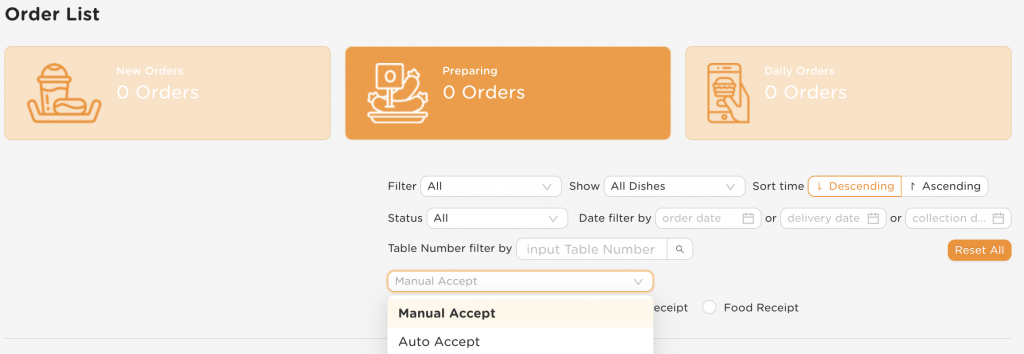

At the top of the Order List you will find the Auto / Manual Accept options and the Auto Print Options.
Orders will only auto print when they are accepted. So if you want them to truly auto print without any human interaction, you must select Auto Accept, and then click one of the receipts you want to auto print.
You can use any combination of these settings, for example:
a) If you want to manually accept orders first, then they print the combined receipt, select Manual Accept, and tick the combined receipt option. This will automatically print the order once you have accepted it.
b) If you want to manually accept orders, then print a separate food receipt and drink receipt, select Manual Accept, and tick the Drink Receipt and Food Receipt options. This will automatically print the two separate receipts once you have accepted the order.
c) If you want to auto accept orders and auto print a combined receipt, select Auto Accept and tick the Combined Receipt option. This will automatically accept and print the order with no human interaction.
